Here at Univate, we know the power of Salesforce low-code automations. Salesforce Flow is a powerful tool that allows you to automate complex business processes without writing any code. One of the capabilities of Salesforce Flow is making HTTP callouts to external services, which can be particularly useful for integrating Salesforce with other systems. In this article, we will walk through the process of creating an HTTP callout to the endpoint “https://dummy.restapiexample.com/” using Salesforce Flow.
Step 1: Understanding HTTP Callouts Before we dive into the technical details, it’s important to understand what an HTTP callout is. An HTTP callout is a request sent from Salesforce to an external service over the HTTP protocol. This request can be used to retrieve data from the service, send data to it, or both.
Step 2: Setting Up Permissions To make an HTTP callout from Salesforce, you need to have the appropriate permissions. Ensure that you have the “API Enabled” permission and that your profile or permission set allows you to make callouts.
Step 3: Creating Named Credentials Named Credentials are a secure way of storing authentication data for external services. To create a Named Credential for our endpoint:

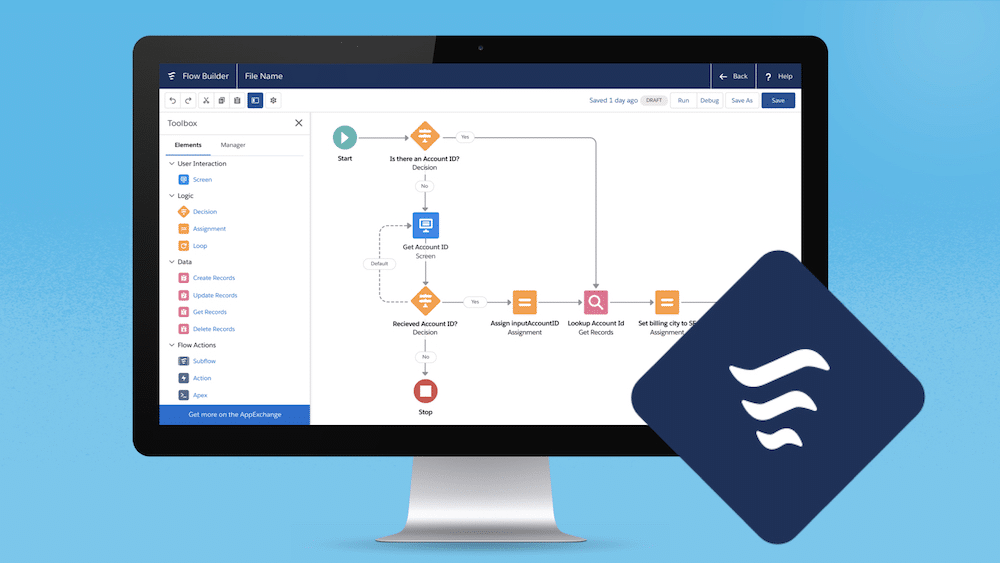
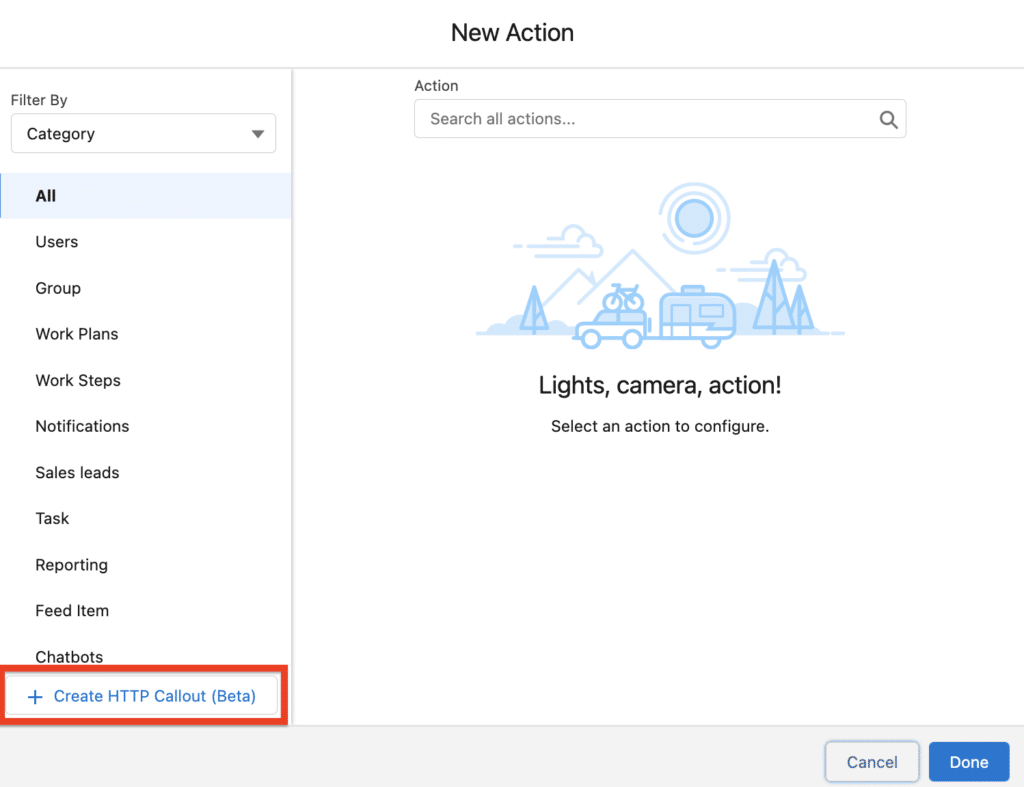
Step 4: Building the Flow Now, let’s build the flow that will make the HTTP callout:
Step 5: Handling the Response After making the callout, you will need to handle the response from the external service:
Step 6: Testing the Flow Before activating the flow, it’s crucial to test it:
Step 7: Activating the Flow Once you’re satisfied with the flow’s performance, activate it:
Step 8: Monitoring and Troubleshooting After activation, monitor the flow to ensure it’s working as expected. If you encounter any issues, use the debug logs and error messages to troubleshoot.
Conclusion Making an HTTP callout with Salesforce Flow is a straightforward process that can greatly enhance your Salesforce automation capabilities. By following the steps outlined in this guide, you can integrate Salesforce with external services and create more powerful, connected business applications.
Please note that this is a simplified guide, and the actual implementation may vary based on the specific requirements of the service you’re integrating with. Always refer to the Salesforce documentation and the API documentation of the external service for detailed instructions and best practices.
I hope this tutorial helps you get started with HTTP callouts in Salesforce Flow. If you have any questions or need further assistance, feel free to reach out. Happy automating!